Monday, March 26, 2012

vintage spiderman

  
Today is my youngest son's 3rd birthday! 
  
  
We celebrated over the weekend with a vintage Spiderman themed party.  
  
Ford loves Spiderman, especially the Spiderman from the 60s . . . and that's where my inspiration for his party came from. 
  
Vintage and new comic books, lots of red, blue, and yellow card-stock, and self-adhesive cut-out letters were the base of the decorations. With those materials, I created bunting/pennants, medallions, table-runners, comic signs, and tags.  
  
Our guests sat at large round tables that were covered with white linens and black table covers. Vintage comic pages were carefully laminated together, and then placed down the center of each table as runners. 


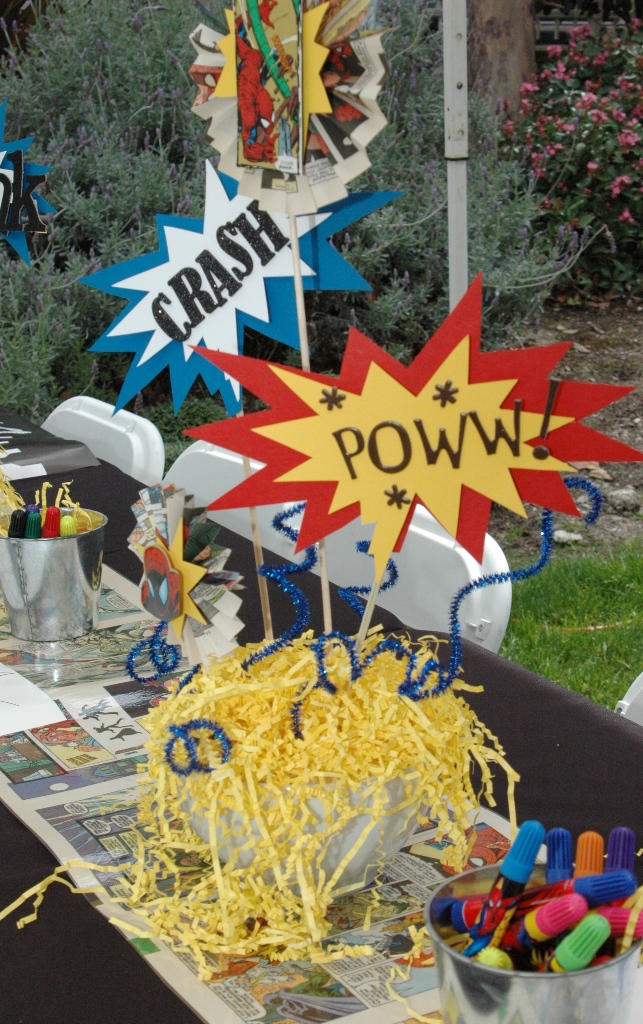
The table centerpieces supported medallions that I made using comic book pages . . . as well as nostalgic comic signs that read "POW!" "BANG!" "BOOM!" "SPLAAT!"


~ Large medallions ~
made from 2 comic book pages


~ Small medallions ~


~ comic word signs ~


~ children's table ~
complete with Spiderman puzzles,
buckets of markers,
and over-sized black & white coloring pages


To set the food and dessert tables apart, I chose to cover them in silver table covers . . . and hung pennant/bunting across the front of each. The pennants were made from Spiderman comic book covers and pages


The silverware, napkin, and plate caddies were small tins also covered in comic book pages.


Our menu was served atop large white stoneware . . .  

served hot . . . sweet & spicy pulled pork
on sweet rolls
~
honey-roasted turkey sandwiches 
on croissant rolls
~
home-made potato salad
home-made pasta salad
~
black olives (Ford's favorite)
potato chips  


Since I don't buy pre-matching decorations or napkins from party stores, it always takes me a little longer to find napkins that coordinate with the theme of the party. I think I found a fun and unique match with these black & white, and blue & white striped napkins! 


 and the pièce de résistance  

Auntie Alex did it, once again!!  

Inspired by a cake originally designed by Valerie of Sweet Picasso Cake Creations, Auntie Alex re-created this MARVEL-ous cake for Ford!

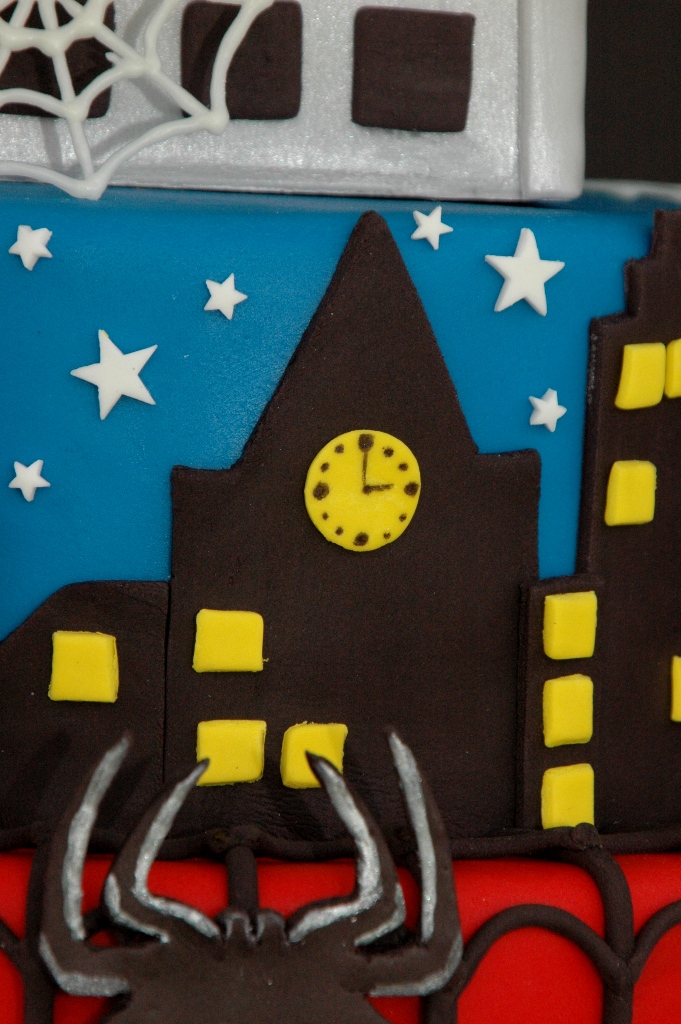
The cake was three tiers of layered, moist vanilla almond cake (colored blue) with vanilla Swiss meringue butter-cream filling, frosted in white chocolate ganache and covered in fondont.  She paid close attention to details (as always), and clustered the skyscraper windows in 3's, and was even sure to set the clock at 3 o'clock!  All in honor of Ford's 3rd birthday! 

My husband and I designed and created the large, black city-scape. It makes for the perfect setting for this MARVEL-ous cake! Did you notice we carved a "3" in windows, on the tallest sky-scraper?


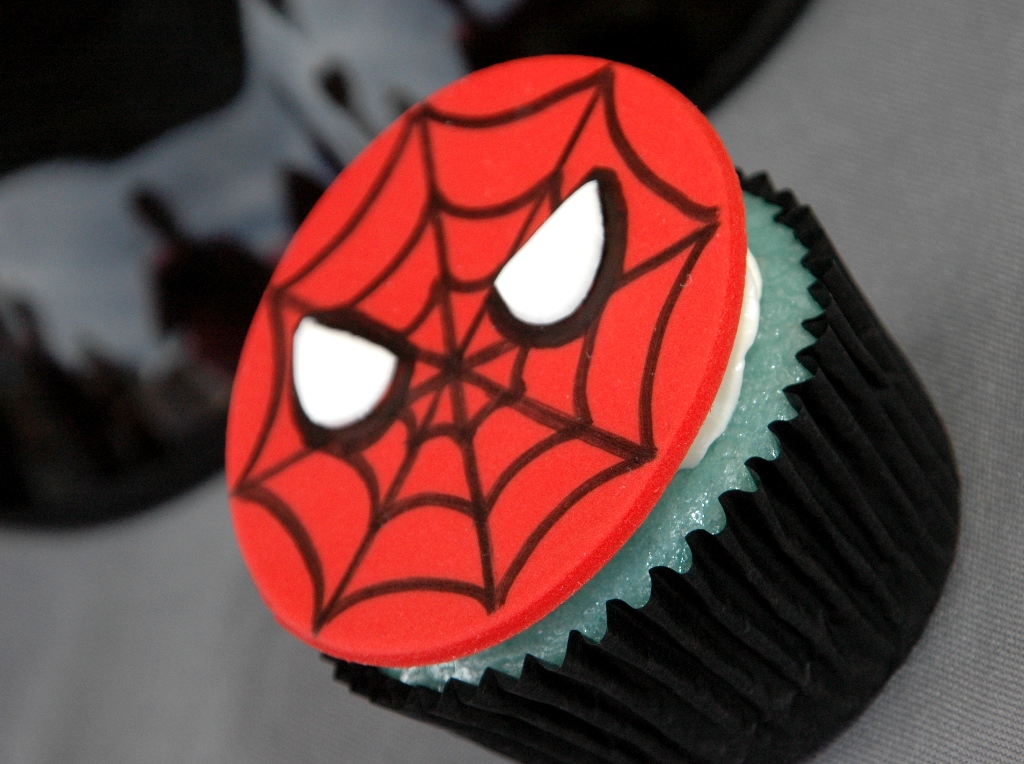
~ The kids loved the Spiderman cupcakes! ~


Everyone went home with a MARVEL-ous marshmallow. Made of HUGE camp-fire marshmallows dipped in white chocolate, and then covered in blue sanding sugar ~ these sweet treats were also a hit with the little ones! 


Ford's special day was filled with family, friends, and our wonderful neighbors . . . good food . . . MARVEL-ous desserts, a HUGE 11' x 30' combination jumper/slide . . . and lots of balloons! 
  
My little guy crashed early and hard that night! 


We love and adore your loving and gentle soul!
Happy 3rd Birthday Ford!
We love you,
Momma and Daddy


Tuesday, March 20, 2012

potato basil frittata

  
le grand petit déjeuner  

. . . translated "the big little lunch" . . . 

I LOVE hosting brunch . . . . 

Because its a meal eaten between or instead of breakfast and lunch, the possibilities are endless.  Your menu can lean more towards breakfast, or lunch, or a combination of both

 I prefer to host what I call a "true brunch" ~ a combination of breakfast and lunch that includes fresh seasonal fruit, yogurt & granola, scones or sweet rolls with a variety of spreads, and a hot dish (preferably savory).  
  
. . . And a wonderful hot dish to serve at brunch is a frittata. Their possibilities are endless! You can make them vegetarian, or with meat.  

I hosted a brunch for my daughter's 1st birthday, and served two kinds of  frittatas. Both had the same base, different add-ins . . . 

Potato Basil Frittata
with yellow, orange, and red peppers
and ~
Potato Basil Frittata
with sweet and spicy Italian sausage

The frittatas that I made were inspired by Ina Garten's Potato Basil Frittata recipe.  In addition, I made hollandaise sauce to serve as a topping. It was a wonderful addition this dish.

As with most dishes, I have a few tips to share . . .

Although you can assemble this dish in advance,
I recommend leaving the egg mixture
in a bowl until you are ready to pour it over the 
potatoes & onions to bake it.
~
For presentation purposes,
I recommend baking it in a spring-form pan.
Upon release, it will yield a beautiful pie-shaped frittata!
~
Let the frittata sit for approximately 15 minutes before cutting.


A few simple ingredients . . .


~ I recommend using a spring-form pan ~
 

Ingredients
1 1/2 stick unsalted butter, divided
2 cups peeled and 1/2-inch diced boiling potatoes (4 potatoes)
1 yellow pepper, finely diced
1 orange pepper, finely diced 
1 red pepper, finely diced 
8 extra-large eggs
15 ounces ricotta cheese
3/4 pound Pepper Jack cheese, grated
1/2 teaspoon kosher salt
1/2 teaspoon freshly ground black pepper
3/4 cup chopped fresh basil leaves
1/3 cup flour
3/4 teaspoon baking powder

Directions
Heat the oven to 350 degrees F.
Melt 3 tablespoons of butter in pan over medium-low heat. Add the potatoes and fry them until cooked through, turning often, about 10 to 15 minutes. 
In another pan, add 2 tablespoons of butter, and saute onions until golden and tender. 
Remove onions and add to fried potatoes. Set aside.
In another pan, melt 2 tablespoons of butter and saute the peppers until tender.
Melt the remaining 5 tablespoons of butter in a small dish in the microwave.
Meanwhile, whisk the eggs, then stir in the ricotta, Pepper Jack, sauteed peppers, melted butter, salt, pepper, and basil. Sprinkle on the flour and baking powder and stir into the egg mixture.


Line the bottom of a 9 or 10-inch spring form pan with parchment paper, and then put together the spring form pan so that the paper sticks out from the base. 
Generously spray with cooking spray. 
Pour the potatoes and onions on the bottom of the spring-form pan. Spread evenly. 


Pour the egg mixture over the potatoes and onions, and place the pan in the center of the oven on top of a baking sheet.


Bake the frittata until it is browned and puffed, 50 minutes to 1 hour. It will be rounded and firm in the middle and a knife inserted in the frittata should come out clean. Serve hot.

 ~ released from spring-form pan ~

~ Slice and enjoy! ~
  

Serve with hollandaise sauce!


Bon Appetit!


Saturday, March 17, 2012

diy milk glass

  
I adore milk glass. 

It reminds me of my grandma Pearl, who lovingly baked many a cookie for me and my sister . . . and taught us that the key to successful quilt making is patience . . . and quilting with friends. 

I love the vintage, textured look of milk glass vases. The price tag, however, can be pretty hefty when you are planning to use a cluster on each table as your centerpieces. Authentic vintage milk glass vases can cost upwards of $30 or more depending on its quality and age. 

I was looking for a reason to try making my own, so I painted several for my youngest daughter's 1st birthday party. It’s easy to make diy milk glass centerpieces using ordinary glass – in fact, this project can cost very little if you search thrift stores or garage sales for glass vases. I’ll bet you even have a few glass vases in your house that would be perfect for this project. But first, let’s take a peek at a real wedding inspiration piece styled by Justin & Mary Marantz.


To do it yourself, all you need is

Assorted glassware
drip tray
latex paint
 

And here's how . . .

1. Clean glassware and let dry completely.

2.  Working over a covered area or tray, pour the paint down inside the walls of the vessel and       slowly swirl to coat, adding more as needed. Once completely coated, hold upside down or prop on the side of your paint can and let the excess drain off.


3.  Set your vessels upside down in a tray, or on a rack, to dry. After 30 minutes, lift and wipe up any paint that's collected on the tray. Repeat until no excess remains, then flip upright and let dry for 24 hours before using. 


~ all dressed up ~


 Make extras to have on hand as hostess, 
birthday, or just-because gifts!
wedding 101


Related Posts Plugin for WordPress, Blogger...