Friday, December 26, 2014

raspberry almond muffins


We're packing as I write this post . . . . laundry is in the works, suitcases are being filled, and snow gear is being snugly packed away in duffel bags.

We're heading out-of-state for a break from 'the every day' and 'California's eternal warm weather' to enjoy the COLD and snow for several days. We have our fingers crossed that it will snow on New Year's Eve!


Muffins (and scones) are one of my favorite foods to share with family and friends.

I LOVE baking a variety of them, and then giving them away in a beautiful basket.

They're wonderful enjoyed as a snack, with breakfast, or for dessert. For me, I enjoy them most warmed up with a cup of coffee in the afternoon, when all is often quiet.


I thought I would share this recipe for raspberry almond muffins before the weekend, as so many of you are still enjoying a long holiday break . . . and you might be in the mood for a little something sweet. 

So much of the holiday hustle and bustle is behind us now . . . so it's a great time to make a batch of them . . . and invite your family family or a few friends over for a relaxed visit.


These raspberry almond muffins are moist and tender! 

I'm a big fan of the warm almond flavor and sweet, slightly tart raspberry jam filled centers . . . YUM!

I hope that you enjoy them as much as we do!

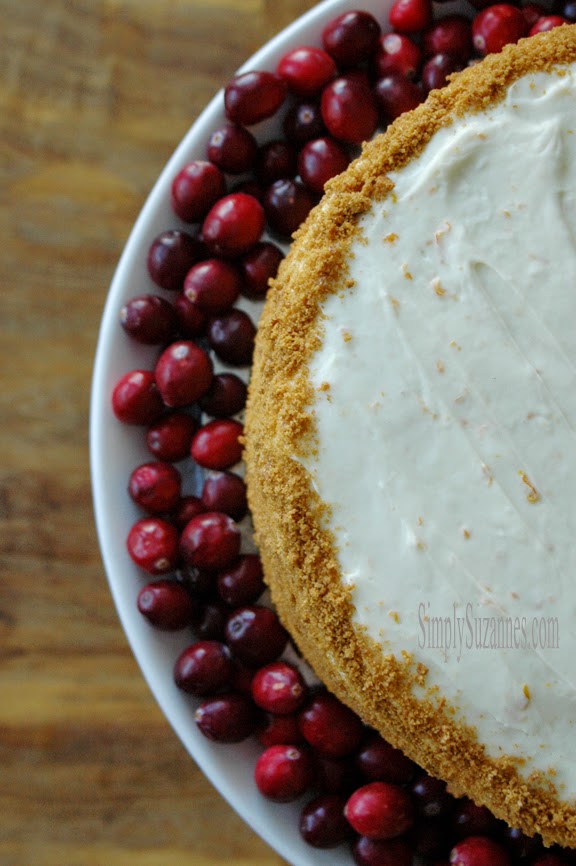
And if you're looking for another delicious muffin, please come by see my Cranberry Orange muffins, here.


raspberry almond muffins
.     .     .     .     .     .
3 cups all purpose flour
1 Tablespoon baking powder
1/2 teaspoon baking soda
1/2 teaspoon salt
10 Tablespoons unsalted butter, softened
1 3/4 cups, PLUS 3 Tablespoons sugar
2 large eggs, room temperature
1 1/2 cups plain low fat yogurt
1 ounce Almond Paste
Raspberry Jam
.     .     .     .     .     .
streusel topping
6 Tablespoons all purpose flour
2 Tablespoon packed light brown sugar
8 teaspoons granulated sugar
4 Tablespoons unsalted butter, cut into 1/2-inch pieces, and softened
pinch salt 
Process flour, brown sugar, granulated sugar, butter and salt in food processor 
until mixture resembles course sand. 
Transfer to a small bowl; set aside
.     .     .     .     .     .

Preparation
Adjust oven rack to lower middle position and heave oven to 375 degrees F.

Spray (or use liners) 12-cup muffin tin with vegetable oil spray.

Mix flour, baking powder, baking soda, and salt in a medium bowl and set aside.

Using a stand mixer fitted with a paddle attachment, beat butter, sugar, and almond paste on medium-high speed until pale and fluffy, about 3 minutes. Add eggs, one at a time, and beat until combined. Reduce speed to low and add dry ingredients in 2 additions, alternating with 3 additions of yogurt, scraping down bowl as needed.

Spoon half portion batter into each muffin cup, then with a small spoon make wells in the center of each portion of batter. Spoon about 1 teaspoon raspberry jam into each well. Fill cups with remaining batter.

Generously sprinkle streusel on top of muffin batter.

Bake until muffins are golden brown and toothpick inserted in center of muffin comes out with few crumbs attached, 25 to 30 minutes, rotating muffin tin halfway through baking.

Remove muffins from the time and set on a wire rack. Let cool for 5 minutes. Serve.
recipe courtesy of Cook's Illustrated

* I like raspberry jam in this recipe but any jam will work.
* I prefer baking muffins in LARGE muffin liners/tins to give them that luscious home-baked appearance.


LET'S STAY in touch!


Friday, December 12, 2014

old-fashioned gingerbread cookies


I love gingerbread! 
 
Whether it's a moist gingerbread loaf, tender cookies, or gingerbread holiday bars . . . there's just nothing that says "It's the holidays!" like gingerbread! 


I bake 9-inch TALL Gingerbread Cookies for my niece and nephews every year. I make extras for my little ones and friends, too.  


It's a simple, yet special, tradition that not only fills my house with the warm smell gingerbread, but these cute cookies bring smiles too! 

I've researched and sampled gingerbread cookie recipes over the years, and THIS ONE is my absolute favorite! It yields a very flavorful cookie that is moist and tender. They are incredibly delicious (and addicting)!  


For ease and good flavor, I decorate them with Almond Bark. I think white and vanilla chocolate are a wonderful compliment to gingerbread cookies!

So grab your holiday sprinkles and rolling pin . . . and bake a few Gingerbread Girls & Boys this holiday season! 


gingerbread cookies
bakes 10-20 cookies depending on size of cookie cutter
.     .     .     .     .     .
5 1/2 cups all-purpose flour, plus more for dusting
1 teaspoon baking soda
1 1/2 teaspoons salt
4 teaspoons ground ginger
4 teaspoons ground cinnamon
1 1/2 teaspoons ground cloves
1 teaspoon freshly grated nutmeg
2 sticks (16 tablespoons) unsalted butter, room temperature
1 cup packed dark-brown sugar
2 large eggs
1 1/2 cups unsulfured molasses
6 small blocks of Almond Bark, melted (found in the baking section of your local market)
.     .     .     .     .     .

Preparation
Whisk together flour, baking soda, salt, and spices in a medium bowl.
Beat butter and sugar with a mixer on medium-high speed until fluffy. Add eggs, 1 at a time, beating well after each addition. Beat in molasses. Reduce speed to low. 

Gradually add flour mixture, and beat until just combined. Divide dough into 3 portions, and wrap each in plastic. Refrigerate for at least 2 hours.
Preheat oven to 350 degrees. 

On a generously floured piece of parchment, roll dough to a scant 1/4 inch thick. Brush off excess flour. Slide dough and parchment onto baking sheets, and freeze for 15 minutes.
Cut out desired shapes. Transfer to parchment-lined baking sheets, and freeze for 15 minutes.
Bake cookies for 12 minutes. 

Cookie TIPS . . . 
You'll notice that the cookies will be puffy when you take them out of the oven, but they will deflate a little as they cool. 

If you desire a flatter Gingerbread Cookie, then remove sheets from oven, and tap them firmly on counter to flatten the cookies. Return to oven, rotating sheets, and bake until crisp but not darkened, 4 to 6 minutes more. Let cool on sheets on wire racks.

Follow melting directions on the Almond Bark package, and spoon into a Wilton squeeze bottle, or spoon melted white candy into a pastry bag with a very small plain round tip (such as Ateco #0 or #1) to pipe designs onto the cookies.  You can also use a Ziploc bag. Let cookies stand at room temperature until set, at least 2 hours (preferably overnight). Cookies can be stored between layers of parchment in airtight containers for up to 1 week.


Here are a few of them 
wrapped in clear cellophane and tied with ribbon . . .


 Happy holiday baking!


LET'S STAY in touch!


Sharing with . . . .

Stephanie Lynn, It's Overflowing, Twelve O Eight, Carrie This Home, Baking in Pajamas, Huckleberry Love, Dwellings, Smart Party Planning,  The Dedicated HouseMod Vintage LifeLori's Culinary Creations, Home Stories, StoneGableAn Extraordinary Day, I'm Not a Trophy Wife, Between Naps on the Front Porch, Rustic Refined,  Tumbleweed ContessaA Stroll Thru Life,Life With GarnishElizabeth & Co,  My Uncommon Slice of Suburbia, Savvy Southern StyleThe Recipe CriticJanine HuldieCarolyn's Homework,  Fluster Buster   Designs by Miss Mandee,  Craftie Allie,  Wednesday morning The Blissful Bee,  The Newlywed Pilgrimage Chic California, Lamberts LatelyLive Laugh RoweSweet Bella Roos, The Charm of Home, From My Front Porch to ours, Delightsome Life.Posed PerfectionKatherine's CornerNancherrowThe Freshman Cook,  Jann OlsonHome  Maid SimpleAnderson + Grant,  Rooted in ThymeEveryday Enchanted Home, Pure Grace Farms A Dish of Daily Life, Bacon Time, Sunflower Supper Club, Tater Tots and Jello,  Cooking with CurlsMade from PinterestSimply Gloria


Thursday, December 11, 2014

North Star sugar cookies . . . and a nativity scene


I am so excited to share this cookie project with you!

It was inspired by my desire to remind our children through this holiday season why we celebrate Christmas.


It's so easy to get caught up in the "I want . . . " this time of year, and forget that we need to spend these weeks and days leading up to Christmas preparing for the coming of Christ.

During this time of Advent, I enjoy reading books about the meaning of Christmas to our children . . . as well as engaging in other enjoyable activities like cookie decorating, holiday crafts, and baking.


I enjoyed sharing with them about the Star of Bethlehem, also known as the North Star and Christmas Star . . . and its significance to the Three Wise Men, or Magi, and the birth of Christ.

Although they are familiar with the story already, it was through an activity like this one that allowed me to share the beautiful story of Christmas again with our children.


Did you notice that I suspended one of the cookies from a string above the nativity?

I think it gives this well-known scene a visual exclamation mark . . . and I love that!

Here's how I did it . . . Using a large pin, I poked a hole into the top of the cookie and strung fishing line through it. I then secured it to a bare branch. The weight of the cookie gently tugged on the branch, which I positioned over the nativity.

This cookie-inspired nativity turned out better than I had imagined!

Although you don't see The Three Wise Men in the photo, they weren't too far away; each of my little ones was holding one of them while I took these photos. 


Although I created this serene scene for, and with, my children . . . I think that it would be a beautiful scene for any holiday gathering. You can individually wrap/bag the cookies and invite guests to take one home . . . and then they, too, can take home a small piece of the Christmas story.


sugar cookies
.     .     .     .     .     .     .     .     .   
2 ¼ cups all-purpose flour
¼ teaspoons baking powder
¼ teaspoon salt
12 Tablespoons (1 ½  sticks) unsalted butter, room temperature
3/4 cup granulated sugar
2 teaspoons pure vanilla extract
1 egg, room temperature
 powder sugar (instead of flour) for rolling out dough
.     .     .     .     .     .     .     .     .    

Preparation
To make the cookies, in a bowl, sift together the flour, baking powder, and salt . . . set aside.

In the bowl of an electric mixer fitted with the flat beater, beat the butter and granulated sugar on medium speed until light and fluffy, about 5 minutes. Beat in the vanilla and egg. Reduce the speed to low and add the flour mixture in three additions, scraping down the sides of the bowl after each addition. Mix until just combined.

Form the dough into a flattened ball, wrap with plastic wrap and refrigerate for at least 3 hours or as long as overnight.

Preheat an oven to 350°F.

Line 2 baking sheets with parchment paper. 

On a lightly floured powder sugar surface, roll out the dough to 1/4-inch thickness. Using cookie cutters, cut out desired shapes. Transfer to the prepared baking sheets, spacing cookies about 2 inches apart, and bake until just golden around the edges, 10 to 15 minutes, depending on the size of the cookies. Transfer the pans to wire racks and let cool for 5 minutes, then remove the cookies from the pans and let cool completely.

Makes 60 3-inch North Star cookies.

I bought the North Star cookie cutter from here.


Sugar Cookie GLAZE
2 ¼  cups confectioners' sugar, sifted
2 Tablespoons light corn syrup
1 Tablespoons milk
1/2 teaspoon pure vanilla extract

.     .     .     .     .     .     .     .     .

Combine ingredients and mix until smooth
Using a small paint brush (or the tip of your finger), spread on top of cookies
Sprinkle sanding sugar on top of GLAZE when it's wet

The secret to a 'clean' sugar edge is not letting the glaze drip down the sides of the cookie.
A thick glaze is also key.
After the glaze has been mixed, add 1 Tablespoon of confectioners' sugar at a time, 
until you get the desired consistency.


LET'S STAY in touch!
.      .      .      .      .


Thank you for stopping by!
I love reading your comments and appreciate them so much!


Wednesday, December 10, 2014

diy laurel wreath for Christmas


I wanted to share a quick diy laurel wreath with you.

I try to decorate our front door for Christmas different every year . . . and this year, I thought I would use scraps from our Christmas tree and make a laurel wreath on a large grapevine wreath that I hang on our door year round.

I was surprised at how fast and easy it was to make this wreath.

I LOVE its simplicity!


materials
.     .     .     .     .     .
8-12 inch tree branches
fishing line or floral wire
grapevine wreath, any size
ribbon


diy
.     .     .     .     .     .
Clip several 8-12 inch branches
Start at the left and right top of the wreath and begin layering the branches toward the bottom
Once at the bottom, place shorter, fuller branches to fill it in
Using fishing line or floral wire, wrap the branches to the wreath in a circular pattern (at least 3 inches apart), until you've circled the laurel branch form. 
Use extra branches to "fill in" as needed. 
Adorn with ribbon or ornament.
Hang and enjoy!


a simple pictorial . . .

clip several 8-12 inch branches

start at the left and right top of the wreath and begin layering the branches toward the bottom
once at the bottom, place shorter, fuller branches to fill in the bottom

 using fishing line or floral wire, wrap the branches to the wreath in a circular pattern (at least 3 inches apart), until you've circled the laurel branch form.
 
Use extra branches to "fill in" as needed.

 Adorn with ribbon!


LET'S STAY in touch!


Sharing with . . . .

Stephanie Lynn, It's Overflowing, Twelve O Eight, Carrie This Home, Baking in Pajamas, Huckleberry Love, Dwellings, Smart Party Planning,  The Dedicated HouseMod Vintage LifeLori's Culinary Creations, Home Stories, StoneGableAn Extraordinary Day, I'm Not a Trophy Wife, Between Naps on the Front Porch, Rustic Refined,  Tumbleweed ContessaA Stroll Thru Life,Life With GarnishElizabeth & Co,  My Uncommon Slice of Suburbia, Savvy Southern StyleThe Recipe CriticJanine HuldieCarolyn's Homework,  Fluster Buster   Designs by Miss Mandee,  Craftie Allie,  Wednesday morning The Blissful Bee,  The Newlywed Pilgrimage Chic California, Lamberts LatelyLive Laugh RoweSweet Bella Roos, The Charm of Home, From My Front Porch to ours, Delightsome Life.Posed PerfectionKatherine's CornerNancherrowThe Freshman Cook,  Jann OlsonHome  Maid SimpleAnderson + Grant,  Rooted in ThymeEveryday Enchanted Home, Pure Grace Farms A Dish of Daily Life, Bacon Time, Sunflower Supper Club, Tater Tots and Jello,  Cooking with CurlsMade from PinterestSimply Gloria


Tuesday, December 9, 2014

old fashioned spice cake with orange cream cheese frosting


During the holidays, you'll often see cakes like a Yule Log, Gingerbread House, and Trifles on dessert tables . . . along with supporting desserts like cookies, candies, and fudge.

BUT have you ever had an old-fashioned Spice Cake?

They're a deliciously flavorful cake full of spices like cinnamon, cloves, cardamom, allspice, and nutmeg! This recipe is extra special because it calls for a tablespoon of grated fresh ginger and a couple of tablespoons of molasses for an amazing zing! 

To further enhance the warm flavors in the cake, I bloomed the spices in butter . . . intensifying their aroma and giving the cake a heightened spice impact throughout its tender and moist crumb.

A luxuriously smooth orange cream cheese frosting is spread between every layer and on the top and sides. The orange zest adds a festive touch to the frosting, as does the addition of the reserved spice mixture from the cake.

These are actually photos of a client's cake. So to see the inside, you'll have to treat your family and friends to one this holiday season. You won't be disappointed!


a few cake TIPS 
.     .     .     .     .     .     .  

To add height to the cake, I cut each 8-inch round in half horizontally so that there are a total of 4 8-inch layers.

You can dress up this cake by adding a cookie crumble top or sides. I love the texture it adds to the cake. If you choose to do this, then I recommend using a dry cookie, like crisp gingersnaps or an old-fashioned cinnamon graham crackers (like the ones found at Trader Joe's). They'll stand up to the moisture of the frosting and stay crisp, giving you delightful contrast of textures. YUM!


Spice Cake Ingredients
1 Tablespoon ground cinnamon 
3/4 teaspoon ground cardamom 
1/2 teaspoon ground allspice 
1/2 teaspoon ground cloves 
1/4 teaspoon ground nutmeg 
16 Tablespoons unsalted butter, softened 
2 1/4 cups all purpose flour 
1/2 teaspoon baking powder 
1/2 teaspoon baking soda 
1/2 teaspoon salt
2 large eggs, plus 3 large yolks, room temperature
1 teaspoon vanilla extract 
1 3/4 cups granulated sugar
2 Tablespoons molasses
1 Tablespoon grated fresh ginger 
1 cup buttermilk, room temperature 

Preparation

Adjust the oven rack to middle position and heat oven to 350 degrees F. 

Grease 2 8-inch cake pans, line with parchment paper, and flour the pan.  

Combine cinnamon, cardamom, all-spice, cloves, and nutmeg in small bowl; reserve 1/2 teaspoon of spice mixture for frosting.  

Melt 4 Tablespoons butter in saucepan over medium heat, 1 to 2 minutes. Cook, swirling pan constantly, until butter is light brown and has faint nutty aroma, 2 to 4 minutes. Add spices and continue to cook, stirring constantly, 15 seconds. Remove from heat and let cool to room temperature, about 3 minutes. 

Whisk flour, baking powder, baking soda, and salt together in medium bowl. In small bowl, gently whisk eggs, egg yolks, and vanilla to combine. Using stand mixer fitted with paddle, beat remaining 12 Tablespoons butter with sugar and molasses on medium high speed until pale and fluffy, about 3 minutes, scraping down the bowl as needed. 

Reduce speed to medium and cooled butter spice mixture, ginger, and half of egg mixture; scrape down the bowl. Repeat with remaining egg mixture; scrape down bowl. Reduce speed to low and add flour mixture in 3 additions, alternating with 2 additions of buttermilk, scraping down the bowl. 

Mix at medium speed until batter is thoroughly combined, about 15 seconds. Give batter a final stir by hand.  

Scrape batter into prepared pans, smooth tops with rubber spatula, and gently tap pan on counter to release air bubbles. 

Bake cake until toothpick inserted in center comes out clean, 32 to 37 minutes. 

Let cake cool completely in pan or on wire rack, about 2 hours. Run pairing knife around edge of cake to loosen from pan. Invert cakes onto a wire rack, discard parchment, then turn cakes right side up. 

Stir reserved spice mixture into frosting. Spread frosting over cakes (see recipe below). 

Bring cake to room temperature before serving. 

Another exceptional recipe from Cook's Illustrated.


silky Orange Cream Cheese frosting
do not use low fat or non fat cream cheese or the frosting will turn out too soupy to work with
.     .     .     .     .     .     .
12 ounces cream cheese, room temperature
6 Tablespoons unsalted butter, room temperature
4 teaspoons sour cream
1 teaspoon vanilla extract
1 1/2 teaspoons grated orange zest
1/4 teaspoon salt
1 3/4 cups (7 ounces) confectioners' sugar
.     .     .     .     .     .     .

Using a stand mixer fitted with a whisk, mix cream cheese, butter, sour cream, vanilla, orange zest, and salt at medium high speed until well combined, about 30 seconds, scraping down the bowl with a rubber spatula as needed. Add confectioners' sugar and mix until very fluffy, about 1 minute.


LET'S STAY in touch!


Sharing with . . . .

Stephanie Lynn, It's Overflowing, Twelve O Eight, Carrie This Home, Baking in Pajamas, Huckleberry Love, Dwellings, Smart Party Planning,  The Dedicated HouseMod Vintage LifeLori's Culinary Creations, Home Stories, StoneGableAn Extraordinary Day, I'm Not a Trophy Wife, Between Naps on the Front Porch, Rustic Refined,  Tumbleweed ContessaA Stroll Thru Life,Life With GarnishElizabeth & Co,  My Uncommon Slice of Suburbia, Savvy Southern StyleThe Recipe CriticJanine HuldieCarolyn's Homework,  Fluster Buster   Designs by Miss Mandee,  Craftie Allie,  Wednesday morning The Blissful Bee,  The Newlywed Pilgrimage Chic California, Lamberts LatelyLive Laugh RoweSweet Bella Roos, The Charm of Home, From My Front Porch to ours, Delightsome Life.Posed PerfectionKatherine's CornerNancherrowThe Freshman Cook,  Jann OlsonHome  Maid SimpleAnderson + Grant,  Rooted in ThymeEveryday Enchanted Home, Pure Grace Farms A Dish of Daily Life, Bacon Time, Sunflower Supper Club, Tater Tots and Jello,  Cooking with CurlsMade from PinterestSimply Gloria


Thursday, December 4, 2014

thick and chewy triple chocolate cookies!


These are - hands down - the best chocolate cookies I've ever eaten!

Just to give you an idea of their decadence . . .

One pound of melted semi-sweet chocolate is added to the batter; that, along with 4 eggs! Making for deliciously chocolaty cookies that are incredibly moist and chewy. 

They remind me somewhat of a brownie, but in the form of a cookie. 


I offer them on my catering/baked goods menu . . . and they're always a hit.

During the holidays, I add Andes Creme de Menthe or Peppermint Crunch (along with semi sweet chocolate chips) to the batter to add a festive twist . . . and they're soooo good!

So if you're looking for an amazing cookie to share with your family and friends this holiday season, then give these cookies a try. You'll LOVE them, too!


thick and chewy triple chocolate cookies
Resist the urge to bake the cookies longer than indicated; 
they may appear under baked at first, but will firm as they cool.
.      .      .      .      .      .      .      .
2 cups (10 ounces) all-purpose flour
1/2 cup Dutch processed cocoa
2 teaspoons baking powder
1/2 teaspoon salt
1 pound semi-sweet chocolate, chopped
4 large eggs, room temperature
2 teaspoons vanilla extract
2 teaspoons INSTANT coffee or espresso powder
10 Tablespoons unsalted butter, softened
1 1/2 cups packed light brown sugar
1/2 cup granulated sugar
2 cups semi-sweet chocolate chips
.      .      .      .      .      .      .      .


Adjust oven racks to upper middle and lower middle positions and heat the oven to 350 degrees F.

Line 2 baking sheets with parchment paper. 

Whisk flour, cocoa, baking powder and salt together in a medium bowl; set aside.

Microwave chocolate at 50 percent power for 2 minutes. Stir chocolate and continue heating until melted, stirring once every additional minute; set aside to cool slightly.

Whisk eggs and vanilla together in medium bowl, sprinkle with instant coffee over the top to dissolve, and set aside.

Using a stand mixer fitted with a paddle, beat butter, brown sugar, and granulated sugar at medium speed until combined, about 45 seconds; mixture will look granular. Reduce speed to low, gradually add egg mixture, and mix until incorporated, about 45 seconds. Add melted chocolate in steady stream and mix until combined, about 40 seconds, scraping down bowl as needed.

With mixer still running on low, add dry ingredients and mix until just combined. Do not over beat.
Fold in 2 cups of semi-sweet chocolate chips to batter. 

If you're adding Andes mints or Peppermint Crunch, then decrease semi-sweet chocolate chips to 1 cup; and add 2 cups of Andes.

Cover bowl with plastic wrap and let stand at room temperature until consistency is scoopable and fudgelike, about 30 minutes.

Working with 2 Tablespoons of dough at a time, roll into balls and place 1 1/2 inches apart on prepared baking sheets.

Bake until edges of cookies have just begun to set but centers are still very soft, about 10 minutes, switching and rotating baking sheets halfway through baking. 

Let cookies cool on baking sheet for 10 minutes; transfer cookies to wire rack and let cool to room temperature. (Courtesy Cook's Illustrated)


LET'S STAY in touch!


Sharing with . . . .

Stephanie Lynn, It's Overflowing, Twelve O Eight, Carrie This Home, Baking in Pajamas, Huckleberry Love, Dwellings, Smart Party Planning,  The Dedicated HouseMod Vintage LifeLori's Culinary Creations, Home Stories, StoneGableAn Extraordinary Day, I'm Not a Trophy Wife, Between Naps on the Front Porch, Rustic Refined,  Tumbleweed ContessaA Stroll Thru Life,Life With GarnishElizabeth & Co,  My Uncommon Slice of Suburbia, Savvy Southern StyleThe Recipe CriticJanine HuldieCarolyn's Homework,  Fluster Buster   Designs by Miss Mandee,  Craftie Allie,  Wednesday morning The Blissful Bee,  The Newlywed Pilgrimage Chic California, Lamberts LatelyLive Laugh RoweSweet Bella Roos, The Charm of Home, From My Front Porch to ours, Delightsome Life.Posed PerfectionKatherine's CornerNancherrowThe Freshman Cook,  Jann OlsonHome  Maid SimpleAnderson + Grant,  Rooted in ThymeEveryday Enchanted Home, Pure Grace Farms A Dish of Daily Life, Bacon Time, Sunflower Supper Club, Tater Tots and Jello,  Cooking with CurlsMade from PinterestSimply Gloria


Related Posts Plugin for WordPress, Blogger...