


Our oldest daughter's teacher gave our family a bag of beautiful lemons from a lemon tree that's growing on campus.
I was so delighted!

You can always find lemons, oranges, blackberries/strawberries/and blueberries in my fridge. I use the citrus in my cooking and baking, and my kids love their berries!
I use lemon zest (and a splash of lemon juice) in many of my dishes, dressings, and desserts.
With so many gifted lemons, I thought it would be fun to make (my favorite) glazed lemon cookies and an amazingly moist and tender lemon bundt cake to share with our neighbors and teachers.

The glazed lemon cookie recipe is one of my favorites, and comes from my loved and trusted Cooks Illustrated Cookbook.
What makes them so special is that they're a combination of a sugar cookie and shortbread. They're tender, slightly chewy, buttery, and lemony.

You can finish them with, or without, a glaze. I actually prefer them without the glaze, but my husband and kids like the extra sweetness that the glaze gives this delightful cookie.
I top the glazed cookies with a few specks of lemon zest for a beautiful finish when I make them to give as a gift, or when I serve them at a bridal or baby shower.

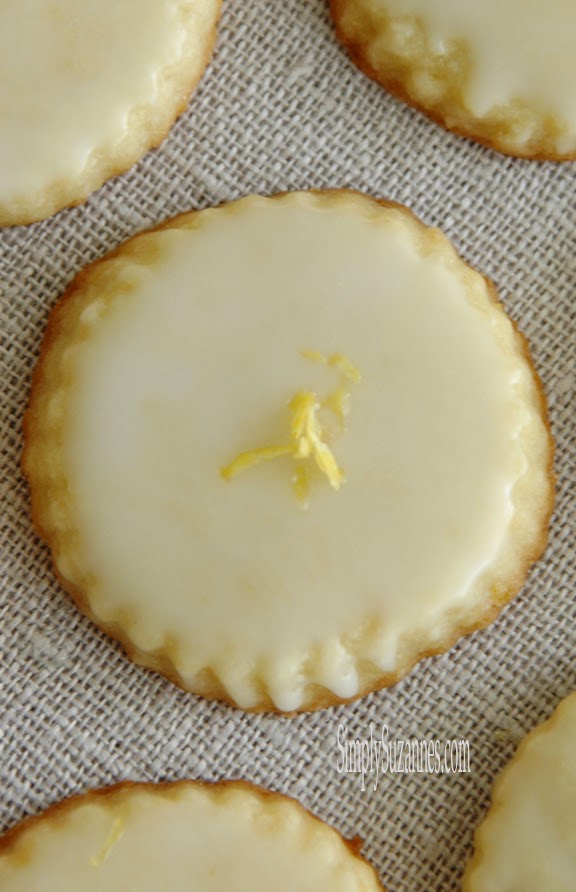

And if you love a cup of hot herbal tea at the end of a long day, then this is your cookie!

Glazed Lemon Cookies
Cookies
¾ cup granulated sugar
2 tablespoons grated zest, plus 2 tablespoons juice from 2
lemons
1¾ cup all-purpose flour
¼ teaspoon baking powder
¼ teaspoon salt
12 tablespoons (1½ sticks) cold unsalted butter, cut into
½-inch cubes
1 large egg yolk
½ teaspoon vanilla extract
Cookie preparation
In a food processor, process the
granulated sugar and lemon zest until the sugar looks damp and the zest is
thoroughly incorporated, about 30 seconds.
Add the flour, baking powder, and
salt; pulse to combine, about ten 1-second pulses. Scatter the butter pieces
over the dry ingredients; pulse until the mixture resembles fine cornmeal,
about fifteen 1-second pulses.
In a measuring cup or small bowl, beat together
the lemon juice, egg yolk, and vanilla with a fork to combine.
With the machine
running, add the juice mixture in a slow, steady stream (the process should
take about 10 seconds); continue processing until the dough begins to form a
ball, 10 to 15 seconds longer.
Turn the dough and any dry bits onto a clean work
surface; working quickly, gently knead to ensure that no dry bits remain and
the dough is homogeneous.
Roll the dough into a cylinder approximately 10 inches
long and 2 inches in diameter. Center the dough on a piece of parchment. Fold
the paper over the dough. Grasp one end of the parchment. With the other hand,
use a bench scraper to firmly press the parchment against the dough to form a
uniform cylinder. Roll the parchment and twist the ends together to form a
tight seal.
Chill the dough until firm and cold, about 45 minutes in the
freezer or 2 hours in the refrigerator. (The dough will keep in the
refrigerator for up to 3 days or in the freezer for up to 2 weeks.)
Meanwhile, adjust the oven racks to the upper- and
lower-middle positions; heat the oven to 375 degrees.
Line 2 large baking sheets with parchment paper or spray
them with nonstick cooking spray.
Remove the dough log from its wrapper and, using
a sharp chef’s knife, slice the dough into rounds 3/8 inch thick; place the
rounds on the prepared baking sheets, spacing them about 1 inch apart. Bake
until the centers of the cookies just begin to color and the edges are golden
brown, 14 to 16 minutes, rotating the baking sheets front to back and top to
bottom halfway through the baking time.
Cool the cookies on the baking sheets
about 5 minutes; using a wide metal spatula, transfer the cookies to a wire
rack and cool to room temperature before glazing.
recipe courtesy of Cook's Illustrated
lemon glaze
. . . . . .
1 tablespoon cream cheese, softened
2 tablespoons juice from 1 lemon
1½ cups (6 ounces) confectioners’ sugar
. . . . . .
When the cookies have cooled, spoon
a scant teaspoon of glaze onto each cookie
and spread evenly with the back of
the spoon.
*I prefer to use a pastry brush, and lightly brush a THIN coat of glaze on top.
*I prefer to use a pastry brush, and lightly brush a THIN coat of glaze on top.
Let the cookies stand on a wire rack until the glaze is set and dry,
about 1 hour.
The cookies are best eaten the day they are glazed.
I use the 2-inch cookie cutter from the Williams Sonoma fluted cutter set when I make these cookies. I love the ruffled edges!
You can see more of my 'at home' Kitchen Essentials here

LET'S STAY in touch!
. . . . .
Thank you so much for stopping by!
I love reading your comments and appreciate them so much!
Sharing with . . . .
Thoughts from Alice, DIY Showoff, Stephanie Lynn, It's Overflowing, Twelve O Eight, Carrie This Home, Huckleberry Love, Dwellings, Smart Party Planning, The Dedicated House, Mod Vintage Life, Lori's Culinary Creations, Home Stories, StoneGable, An Extraordinary Day, I'm Not a Trophy Wife, Karen's Up on the Hill, Three Kids and a Fish, Between Naps on the Front Porch, Tumbleweed Contessa, A Stroll Thru Life,, Life With Garnish. Elizabeth & Co, Home Remedies, My Uncommon Slice of Suburbia, Savvy Southern Style, Just a Girl and Her Blog, The Recipe Critic, Janine Huldie, Carolyn's Homework, Fluster Buster Designs by Miss Mandee, Craftie Allie, Wednesday morning The Blissful Bee, The Newlywed Pilgrimage, Lamberts Lately, Live Laugh Rowe, The Charm of Home, From My Front Porch to ours, Delightsome Life., Posed Perfection, Katherine's Corner,Imparting Grace, Nancherrow, The Freshman Cook, Jann Olson, Home Maid Simple, Anderson + Grant, Rooted in Thyme, Shabby Nest Sunflower Supper Club, Blooming Homestead, The Girl Creative, Reasons to Skip the Housework, View from the Fridge, 3 Little Greenwoods


